〇、前言:
偶然间看到Hexo博客,纯静态感觉很不错,有种像黑客的赶脚。
- 如果你对默认配置满意,只需几个命令便可秒搭一个hexo。
- 如果你跟我一样喜欢折腾下,30分钟也足够个性化。
- 如果你过于喜欢折腾,可以折腾个把星期,尽情的玩。
一、历史:
hexo出自台湾大学生tommy351之手,是一个基于Node.js的静态博客程序,其编译上百篇文字只需要几秒。hexo生成的静态网页可以直接放到GitHub Pages,BAE,SAE等平台上。
二、快速搭建
以下快速搭建hexo步骤:
1.git
下载之后一路下一步,唯一需要注意的是,在Select Components界面,点选Simple context menu。
2.注册github
这里要选定好自己的名字,因为以后这就是你博客的名字(如果你不购买独立域名的话)。
3.Node.js
Node.js官方下载地址:https://nodejs.org/
下载好之后,双击安装,一路next即可。
4.安装Hexo
右击任意位置,选择Git Bash Here。1
npm install -g hexo
报错如下:
1 | npm ERR! Error: shasum check failed for C:\Users\ADMINI~1\AppData\Local\Temp\npm |
莫非是因为被墙了?换国内镜像源试试。1
npm config set registry="http://registry.cnpmjs.org",
然后再次执行npm install -g hexo,成功!
创建文件夹
建立网站程序的目录,比如E:\hexo,打开Git Bash,执行命令:1
hexo init
Hexo 即会在目标文件夹建立网站所需要的所有文件。
安装依赖包
1 | npm install |
本地查看
1 | hexo g |
然后到浏览器输入http://localhost:4000 查看效果。
至此,本地博客已经搭建起来了,别人看不到的。
5.Github部署
在自己Github主页右下角,创建一个新的repository。比如我的Github账号是r00to1,那么我应该创建的repository名字应该是r00to1.github.io。
编辑_config.yml (在e:\hexo下)。你在部署时,要把下面的r00to1都换成你的账号名。1
2
3
4deploy:
type: git
repository: git@github.com:r00to1/r00to1.github.io.git
branch: master
据说最新版本的hexo 中,这里的 type 要写成 git,而不是 github。
执行下列指令即可完成部署。
静态化处理:
写完了文章,我们就可以发布了。要说明的一点是hexo的静态博客框架,那什么是静态博客呢?静态博客,是只包含html, javascript, css文件的网站,没有动态的脚本。虽然我们是用Node进行的开发,但博客的发布后就与Node无关了。在发布之前,我们要通过一条命令,把所有的文章都做静态化处理,就是生成对应的html, javascript, css,使得所有的文章都是由静态文件组成的。
1 | hexo generate |
接下来,我们把这个博客发布到github。1
2
3
4hexo deploy
[info] Start deploying: github
[info] Setting up GitHub deployment...
Initialized empty Git repository in D:/workspace/javascript/nodejs-hexo/.deploy/.git/
如果报错:1
ERROR Deployer not found: git
执行:1
npm install hexo-deployer-git --save
然后再次执行:1
hexo deploy
如果之前配置过github,就能成功上传了,直接访问你的地址:http://r00to1.github.io
如果报错如下,则必须要先配置SSH,然后才可以上传文件。1
2
3
4
5
6
7
8
9
10
11
12
13
14
15INFO Deploying: git
INFO Clearing .deploy folder...
INFO Copying files from public folder...
warning: LF will be replaced by CRLF in 2015/05/30/hello-world/index.html.
The file will have its original line endings in your working directory.
......
*** Please tell me who you are.
Run
git config --global user.email "you@example.com"
git config --global user.name "Your Name"
to set your account's default identity.
Omit --global to set the identity only in this repository.
SSH-key
设置Git的user.name和user.email
在第一次使用Git时,你需要告诉你的协同开发者,你是谁以及你的邮箱,在你提交的时候,Git需要这两个信息。具体通过以下命令设置:1
2git config --global user.name "yourname"
git config --global user.email "youremail@email.com"
需要注意的是,这里的name随意,邮箱是你的联系邮箱,与github完全无关。
查看配置命令:1
git config --list
生成SSH密钥
1 | ssh-keygen -t rsa -C "youremail@email.com",按3个回车,密码为空(这里可以设置一个密码)。 |
在C:\Users\Administrator.ssh下,得到两个文件id_rsa和id_rsa.pub。
需要注意的是,命令中的-C参数,后面跟的内容是注释。也就是说,内容随意,与github完全无关。
在GitHub上添加SSH密钥
打开id_rsa.pub,复制全文。https://github.com/settings/ssh ,Add SSH key,粘贴进去。
测试
1 | ssh git@github.com |
之后再运行:1
2
3
4
5
6$ hexo deploy
INFO Deploying: git
INFO Clearing .deploy folder...
INFO Copying files from public folder...
warning: LF will be replaced by CRLF in 2011/11/11/hello-world/index.html.
The file will have its original line endings in your working directory.
记住:每次修改本地文件后,需要hexo generate才能保存。每次使用命令时,都要在E:\hexo目录下。
成功上传!打开地址,就能看到你的博客了。
6.配置和使用
整体目录结构如下:
- deploy:执行hexo deploy命令部署到GitHub上的内容目录
- public:执行hexo generate命令,输出的静态网页内容目录
- scaffolds:layout模板文件目录,其中的md文件可以添加编辑
- scripts:扩展脚本目录,这里可以自定义一些javascript脚本
- source:文章源码目录,该目录下的markdown和html文件均会被hexo处理。该页面对应repo的根目录,404文件、favicon.ico文件,CNAME文件等都应该放这里,该目录下可新建页面目录。
- _drafts:草稿文章
- _posts:发布文章
- themes:主题文件目录
- _config.yml:全局配置文件,大多数的设置都在这里
- package.json:应用程序数据,指明hexo的版本等信息,类似于一般软件中的关于按钮
1
2
3
4
5
6
7
8
9
10
11.
├── .deploy
├── public
├── scaffolds
├── scripts
├── source
| ├── _drafts
| └── _posts
├── themes
├── _config.yml
└── package.json
在这里,我们每次用到的就是_posts目录里的文件,而_config.yml文件和themes目录是第一次配置好就行了。_posts目录:Hexo是一个静态博客框架,因此没有数据库。文章内容都是以文本文件方式进行存储的,直接存储在_posts的目录。
Hexo天生集成了markdown,我们可以直接使用markdown语法格式写博客,例如:hello-world.md。新增加一篇文章,就在_posts目录,新建一个xxx.md的文件。themes目录:是存放皮肤的,包括一套Javascript+CSS样式和基于EJS的模板设置。通过在themes目录下,新建一个子目录,就可以创建一套新的皮肤,当然我们也可以直接在landscape上面修改。
e:\hexo_config.yml
站点配置用e:\hexo\_config.yml,我们来介绍下。
- 站点信息: 定义标题,作者,语言
- URL: URL访问路径
- 文件目录: 正文的存储目录
- 写博客配置:文章标题,文章类型,外部链接等
- 目录和标签:默认分类,分类图,标签图
- 归档设置:归档的类型
- 服务器设置:IP,访问端口,日志输出
- 时间和日期格式: 时间显示格式,日期显示格式
- 分页设置:每页显示数量
- 评论:外挂的Disqus评论系统
- 插件和皮肤:换皮肤,安装插件
- Markdown语言:markdown的标准
- CSS的stylus格式:是否允许压缩
- 部署配置:github发布
`1
2
3
4
5
6
7
8
9
10
11
12
13
14
15
16
17
18
19
20
21
22
23
24
25
26
27
28
29
30
31
32
33
34
35
36
37
38
39
40
41
42
43
44
45
46
47
48
49
50
51
52
53
54
55
56
57
58
59
60
61
62
63
64
65
66
67
68
69
70
71
72
73
74
75
76# Hexo Configuration
## Docs: http://hexo.io/docs/configuration.html
## Source: https://github.com/hexojs/hexo/
# Site 这里的配置,哪项配置反映在哪里,可以参考我的博客
title: your's blog #站点名,站点左上角
subtitle: Walk steps step by step #副标题,站点左上角
description: Walk steps step by step #给搜索引擎看的,对站点的描述,可以自定义
author: zippera #在站点左下角可以看到
email: #你的联系邮箱
language: zh-CN #中国人嘛,用中文
# URL #这项暂不配置,绑定域名后,欲创建sitemap.xml需要配置该项
## If your site is put in a subdirectory, set url as 'http://yoursite.com/child' and root as '/child/'
url: http://your.com
root: /
permalink: :year/:month/:day/:title/
tag_dir: tags
archive_dir: archives
category_dir: categories
# Writing 文章布局、写作格式的定义,不修改
new_post_name: :title.md # File name of new posts
default_layout: post
auto_spacing: false # Add spaces between asian characters and western characters
titlecase: false # Transform title into titlecase
max_open_file: 100
filename_case: 0
highlight:
enable: true
backtick_code_block: true
line_number: true
tab_replace:
# Category & Tag
default_category: uncategorized
category_map:
tag_map:
# Archives 默认值为2,这里都修改为1,相应页面就只会列出标题,而非全文
## 2: Enable pagination
## 1: Disable pagination
## 0: Fully Disable
archive: 1
category: 1
tag: 1
# Server 不修改
## Hexo uses Connect as a server
## You can customize the logger format as defined in
## http://www.senchalabs.org/connect/logger.html
port: 4000
logger: false
logger_format:
# Date / Time format 日期格式,不修改
## Hexo uses Moment.js to parse and display date
## You can customize the date format as defined in
## http://momentjs.com/docs/#/displaying/format/
date_format: MMM D YYYY
time_format: H:mm:ss
# Pagination 每页显示文章数,可以自定义,我将10改成了5
## Set per_page to 0 to disable pagination
per_page: 5
pagination_dir: page
# Disqus Disqus插件,我们会替换成“多说”,不修改
disqus_shortname:
# Deployment
## Docs: http://hexo.io/docs/deployment.html
deploy:
type: git
repository: git@github.com:r00to1/r00to1.github.io.git
branch: master
7.其他
hexo其他命令
- help 查看帮助信息
- init 创建一个hexo项目
- migrate 从其他系统向hexo迁移
- version 查看hexo的版本
- –config参数,指定配置文件,代替默认的_config.yml
- –debug参数,调试模式,输出所有日志信息
- –safe参数,安全模式,禁用所有的插件和脚本
- –silent参数,无日志输出模式
1
2
3
4
5
6
7hexo new "postName" #新建文章
hexo new page "pageName" #新建页面
hexo generate #生成静态页面至public目录
hexo server #开启预览访问端口(默认端口4000,'ctrl + c'关闭server)
hexo deploy #将.deploy目录部署到GitHub
hexo help # 查看帮助
hexo version #查看Hexo的版本
简写:1
2
3
4hexo generate = hexo g
hexo server = hexo s
hexo deploy = hexo d
hexo new = hexo n
BUG
- 有网友反应右键菜单中没有git bash选项,可以进入开始菜单找到git bash,然后通过cd进入相应目录执行命令。
- 在github部署完成之后,马上访问可能出现404错误,这是正常的,(最多)等待十分钟左右就可以访问了。如果还不行,那很可能是 github 发送给你的验证邮件你没有打开看,据多方反映,验证后就没问题了。
- 如果在hexo d之后出现fatal: ‘username.github.io’ does not appear to be a git repository,一是检查 repo 的名字是否合乎规范、是否含有大写字母、config.yml 中的 deploy 配置是否正确,二是把 git bash 关掉,重新打开再执行命令。
- 有的同学可能不是 IT 界的,或者对shell 命令不太了解。在要求输入密码时,你输入之后密码是不显示的,这是为了安全,并非是你没输上。
- 出现乱码的,不要使用 windows 中的「记事本」打开并编辑文件,推荐使用 sublime text,很简单。如果已经在「记事本」中编辑过,需要使用 sublime text 转码为「utf8」。
- 安装 hexo 时卡在那儿不动,很可能是网络不给力,能全局 break wall 就好了。
- 遇到什么其他的问题,不妨删除.deploy 和db.json 再重新生成试一试。
一些主题
下载下来之后拷贝到themes目录下,然后再_config.yml引用新的主题:1
theme: 新的主题文件夹名称
多说评论
在多说进行注册,获得通用代码。
将通用代码粘贴到themes\light\layout\_partial\comment.ejs里面,如下:1
2
3
4
5<% if ( page.comments){ %>
<section id="comment">
通用代码
</section>
<% } %>
具体请参考《Hexo使用多说教程》
本人博客使用的是Litten开发的主题,所以修改方法是在主题模板中直接引入多说用户名即可。
ps:感谢Litten对模板的开发 @_@!
导航栏添加”关于”
1 | hexo new page "about" |
到source/about/index.md编辑内容。
在/_config.yml中,添加如下:1
2menu:
关于: /about
主页文章显示摘要
编辑md文件的时候,在要作为摘要的文字后面添加<!--more-->即可。
添加自定义404页面
在\source文件夹下建立404.html,内容如下:1
<script type="text/javascript" src="http://www.qq.com/404/search_children.js" charset="utf-8"></script>
即可引用腾讯404找孤儿页面,也为公益事业出一番力量。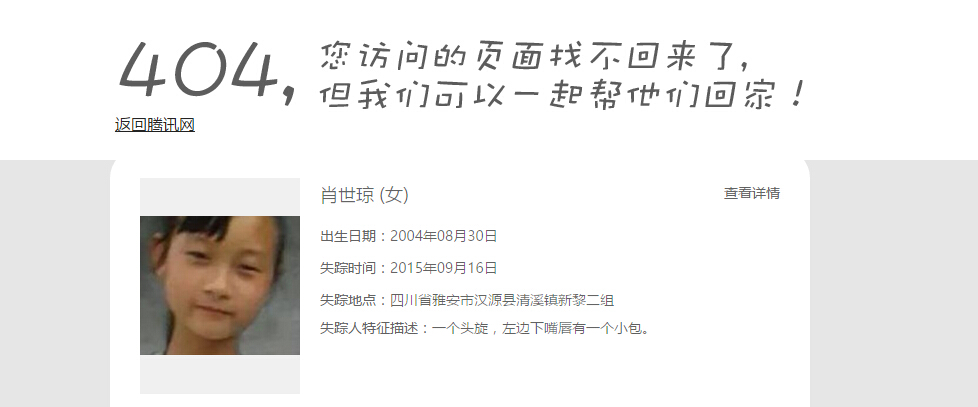
添加数据统计
将获得到的代码添加到模板的底部文件中,即可开启统计。

